
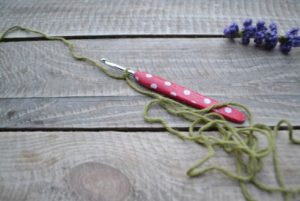
Crochet Lavender Flower
Hey there, lovely reader! Welcome to our cute blog, Handmade Learning Here. Today’s inspo is all about lavender! I absolutely adore this flower. 💜 This pattern we’ve got today can be used for décor or even as a bookmark. It’s the Crochet Lavender Flower pattern.
If you’re all about crochet and love the beauty of flowers, the Lavender Flower crochet pattern is a perfect addition to your repertoire. These blooms not only bring a splash of color and charm to your work but also serve as a wonderful way to practice your crochet skills. Let’s dive into the beauty and simplicity of this pattern!
The Lavender Flower pattern is inspired by the delicacy and softness of lavender blooms. With their elegant petals and gentle colors, these flowers can be used in a variety of projects, from appliqués on clothing to home décor. 🌸✨
Free Crochet Lavender Flower Pattern:
For the Stem:
- Yarn: Drops Paris cotton in green (color 42)
- Hook: 4.5 mm
For the Petals:
- Yarn: The Art of Crochet Magazine yarn (160 meters per 100g) in lavender
- Hook: 3.5 mm
Additional Tools:
- Tapestry needle for weaving in the yarn ends.

Crochet Lavender Flower Pattern
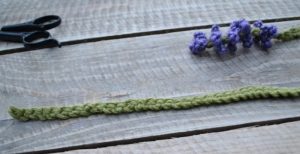
STEP 1: Making the Stem
Let’s start by making the stem for your crochet lavender! For this part, we’ll use a technique called the Romanian cord, which is a type of double chain. It’s thin, making it perfect for a flower stem!
What you need to your Crochet Lavender Flower
- A crochet hook (I used a 4.5mm hook, but feel free to use whatever works best for you)
- Yarn (with a long tail of about 70-100cm, depending on how long you want your stem)
How to start:
Leave a long tail of yarn before you begin the actual chain. This tail should be around 70-100cm, so the stem can have a sturdy, realistic look.
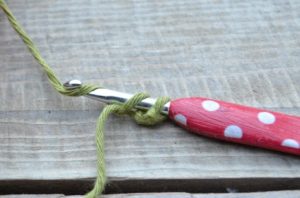
Once you’ve left the tail, make a loop on your hook to start your Romanian cord.
Don’t worry if the Romanian cord sounds tricky at first! With some practice, you’ll get the hang of it in no time.
How to Make the Stitch:
Now, let’s work on the Romanian cord stitch to create the stem. It’s like making a regular chain, but we’re going to add a little twist to make it thicker!
How to do it:
- Start with a regular chain: Insert your hook, yarn over, and pull through the loop, like you’re making a normal chain.
- Grab the tail yarn: This is the important part! Every time you make a stitch, make sure to pull the long tail along with the working yarn. This way, you’ll create two loops with each chain instead of one, which will make the cord thicker and sturdier.
It’s that simple! You’ll see the chain forming, but it’ll be thicker because of the extra yarn. Keep going until your stem is the length you want!
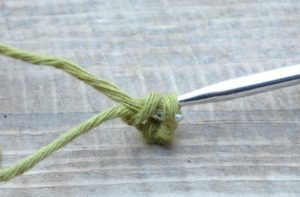
1) Place the hook underneath the tail.
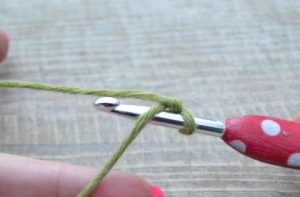
2) Attach the yarn that’s leading to the ball.
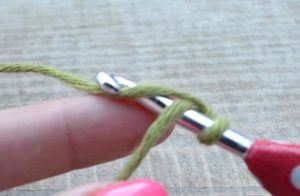
3) Pull the yarn that’s going to the ball under the tail, and now you should have two loops on your hook!
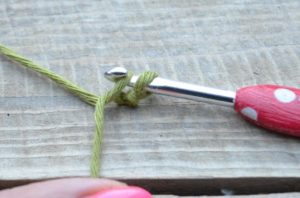
4) Grab the yarn from the ball and pull it through the two loops.
You’ve made your first stitch! Now, just keep repeating this process until your stem reaches the desired length.
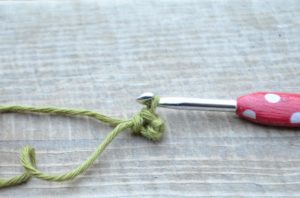
Finishing the Stem: Cut the yarn and pull both ends through the loop on the hook. Tie the ends in a double knot to secure them and prevent unraveling. Finally, tuck the ends inside the stem to hide them away.
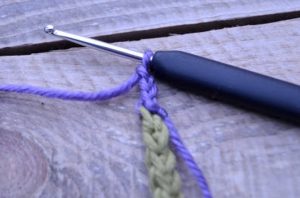
This is the front of the chain:
This is back:
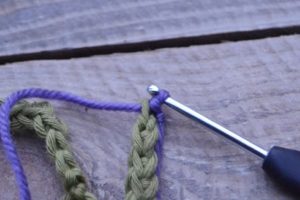
STEP 2: Making the Crochet Lavender Flower
I know this part might look a bit tricky, but don’t worry! I’ll walk you through it step by step.
What You’ll Do:
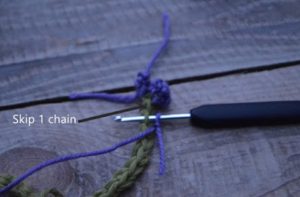
Create Picots: The goal is to crochet picots around the stem of the flower. You’ll need to make a total of 4 picots. These are small decorative loops that give the lavender its beautiful shape.
Placing the Picots:
For the first three picots, you’ll place one in each loop around the stem.
For the fourth picot, you can skip 2 or even 3 stitches before making it. This will help create a layered look.
Total Count: I usually make 5 sets in total: one set with 3 picots and four sets with 4 picots each.
Tips:
- Take your time and don’t rush! If you need to, you can always pause and review each step.
- If you get stuck, feel free to ask for help or look up a video for a visual guide.
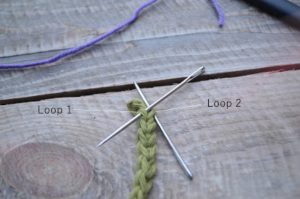
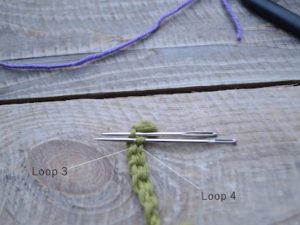
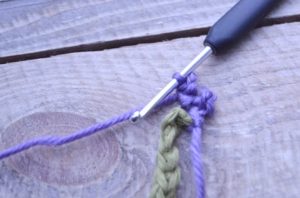
Here are the four loops where you’ll be working your stitches in each round/row:
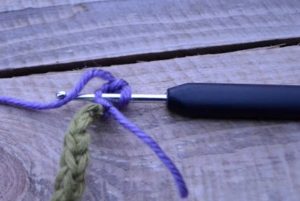
Using a 3.5mm hook (it’s easier to use a smaller hook for the stem), create a loop ring.
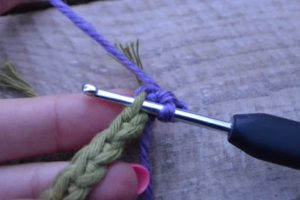
1) Attach the yarn to the first top loop using a slip stitch.
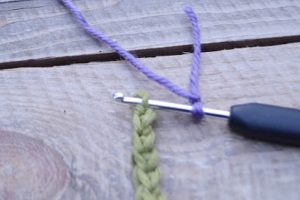
2) Make a picot by chaining 3 stitches, then slip stitch into the first chain to create a loop!
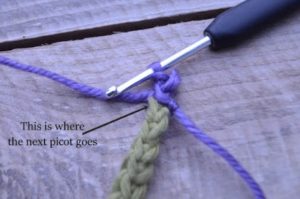
3) Slip stitch into the next loop, then create a picot!
4) Flip the chain around and repeat step 3 two more times (or just once if you want only 3 picots in the first row/round).
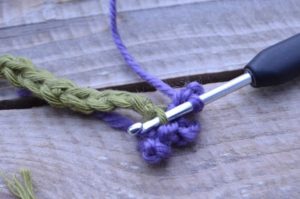
5) Slip stitch to the first loop where you began, then fasten off. Tie both ends of the yarn in a double knot to prevent unraveling, and tuck the ends inside the flower and stem. Finally, trim any excess yarn.
(As I mentioned earlier, you can make just 3 picots in this round for a more realistic look.)
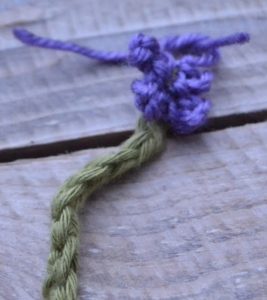
Repeat steps 1-5 four more times, skipping one chain round between each row of 4 picots. Leave 2 or 3 chain rounds blank before the last set of picots to create a larger space.
Crochet Lavender Flower – VIDEO TUTORIAL
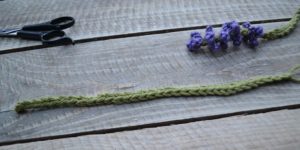
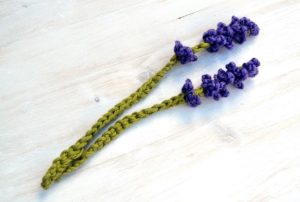
The Crochet Lavender Flower pattern is such a cute way to bring the beauty of nature into your crafting. Not only are these flowers super easy to make, but they also add an adorable touch to any project. So grab your supplies and start creating! With each stitch, you’ll be one step closer to having your very own crochet lavender garden at home.
So happy to have you here, darling! Hope you enjoyed our article. We love bringing you all kinds of free crochet patterns. Have an amazing day, and come back soon! XoXo 💜
I can’t wait to try these out!!
Thank you so much I really appreciate your help I really look forward to making this for my friend I enjoy making different kinds of paderns it’s so much fun
Thank you so much love your work so much fun and very pretty
Lovely! Thanks so much.