Crochet Puff Stitch Flowers
Hello, my dear crocheter friend. Handmade Learning Here welcomes you to the enchanting world of crochet, where creativity knows no bounds. In this article, we dive into the artistry of Crochet Puff Stitch Flowers, a delightful and versatile technique that adds a touch of whimsy to your creations. Let’s explore the intricacies and beauty of this crochet technique together.
These are VERY easy crochet flowers to make and you can follow the pattern here with us. There are not many secrets when making this beautiful flower, and I guarantee that even if you are a beginner you will be able to make your beautiful flowers.
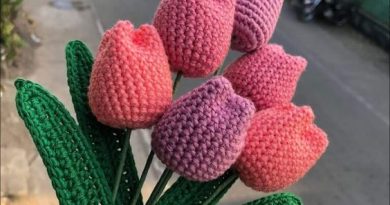
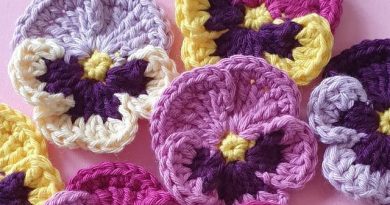
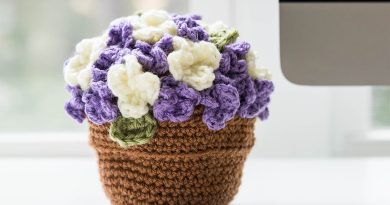
I believe that crochet flowers are wonderful examples, perfect for any season of the year, as they bring life to the context in which they are inserted, and match all projects. They are perfect copies for you to apply to different projects, such as beautiful crochet blankets or apply them to dresses and tiaras.
Understanding the Puff Stitch:
The Puff Stitch, characterized by its plush and textured appearance, serves as the foundation for crafting exquisite crochet flowers. It involves gathering multiple loops on the hook to create a raised, puffy effect. This technique not only adds dimension to your projects but also allows for endless variations in design.
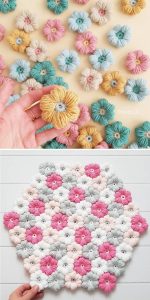
These delicate and charming Crochet Puff Stitch Flowers serve as versatile decorations on their own or can be joined together to create various items such as coasters, blankets, potholders, tablecloths, and more. Crafting these Puff Stitch Flowers is enjoyable, quick, and requires minimal yarn, making it an ideal project for utilizing leftover scraps. Special thanks to Brigitte Read for generously sharing this free crochet pattern.
Materials Needed:
Before embarking on your crochet journey, gather the following materials:
Yarn in your color choice
Crochet hook (size according to your yarn weight)
Yarn needle
Scissors
Step-by-Step Guide: Creating Crochet Puff Stitch Flowers:
Start with a Magic Ring: Begin by creating a magic ring to form the center of your flower. This provides a seamless and adjustable starting point for your project.
- Make a Loop: Wrap the yarn around your finger once or a couple of times.
- Insert Hook: Put your hook through the loop. Pull the long yarn through, then pull it through the loop again (this doesn’t count as a stitch).
- Single Crochet: Work single crochet stitches around the loop.
- Continue Single Crochet: Keep single crocheting until you have five stitches on the loop.
- Tighten the Circle: Pull the short yarn end to tighten the stitches, and they will start to curl.
- Slip Stitch: Insert your hook into the first single crochet and slip stitch to create a firm circle.
- Cut Yarn: Cut the yarn and pull it through the stitch.
- Finishing Touch: Even though you started with 5 stitches, the final count is six due to the way you finish off.
THE FLOWER:
Puff Stitch Petals: Work the puff stitch into each chain, creating individual petals. The number of loops pulled through will determine the puffiness of each petal. Experiment with different loop counts for varied effects.
Step 1: Start by putting your crochet hook into the first stitch.
Step 2: Make a chain of 3 stitches.
Step 3: Put the hook into the first stitch, wrap the yarn around the hook, and pull a loop through (it should be about the same length as the 3 chains, and now you have 2 loops on the hook).
Step 4: Wrap the yarn around the hook again (now you have 3 loops on the hook).
Step 5: Insert the hook into the first stitch and pull a second loop through (now 4 loops on the hook).
Step 6: Wrap the yarn around the hook again (now 5 loops on the hook).
Step 7: Continue this process in each stitch until you have 9 loops on the hook.
Step 8: Wrap the yarn around the hook once more (now 10 loops on the hook).
Step 9: Insert the hook into the first stitch and pull a fifth loop through.
Step 10: Wrap the yarn around the hook.
Step 11: Pull the yarn through all 9 loops on the hook.
Step 12: Once pulled through, a small loop will form at the end.
Step 13: Pull the long end of the yarn through the loop.
Step 14: Make a chain of 3.
Step 15: Put your hook back into the first stitch on the magic loop.
Step 16: Pull the yarn through.
Step 17: Make another chain of 3.
Step 18: Pull a loop through the second stitch on the magic loop and start again for your second petal (repeat Steps 4 to 18 in the relevant stitch on the magic loop).
Step 19: Repeat this process in each stitch for a quicker result.
Step 20: Secure the final 3-chain with a slip stitch in stitch 6 of the magic circle and finish off.
Step 21: Complete your project by weaving in all the loose ends.
Complete your flower by securing the yarn, weaving in loose ends, and shaping the petals to your liking. Add a button or bead to the center for an extra decorative touch. Did you like this pattern, dear reader? Be sure to follow the lovely PDF made by Brigitte Read. I hope you enjoy it as we did.
🏵️🏵️🏵️ Puffy Crochet Flowers PDF 🏵️🏵️🏵️
VIDEO TUTORIAL
Dear reader, whenever possible we like to also provide the option of a video tutorial so that you can better follow the pattern and learn how to do it. By watching it you can better understand the movements, learn new techniques and even familiarize yourself with the pattern. I hope you enjoy watching the video tutorial from the NHÀ LEN channel that we have made available below for you.
Project Ideas:
Crochet Puff Stitch Flowers can be incorporated into various projects, such as:
- Embellishing hats and scarves
- Creating a vibrant floral garland
- Designing decorative pillow covers
- Crafting delicate earrings or accessories
Conclusion:
Crochet Puff Stitch Flowers open the door to a world of creative possibilities. Whether you’re a seasoned crocheter or a beginner, this technique allows you to infuse your projects with a touch of handmade charm. Dive into the colorful realm of crochet and let your imagination blossom with each puff stitch.
What did you think of this adorable pattern, my dear reader? Tell us in the comments. We love knowing what you have to tell us. Send it to your best friends so they can make these beautiful flowers too. If you want to look at other patterns, our Handmade Learning Here blog is full of them. Check out! I hope you have a beautiful day.
Happy crocheting!


These flowers put a smile on my face. Easy to make. I have all this left over yarn i am just going to start making them and take it from there. Thank you for the great video.
How do you attach the puffy flowers for a blanket? Thanks!
Thank you for the instructions & especially the video! They look beautiful and I’m excited to try it. Would please also explain & show how how to connect the flowers for a blanket?
What a beautiful project! I was wondering if you might be able to show or explain how you link these flowers together to make a blanket.