Interlocking Shell Stitch
Hello, my dear reader. Welcome to our lovely blog Handmade Learning Here. Today we want to bring you an incredible pattern that will leave you fascinated. You can simply delight everyone with your adorable baby blanket pattern. It is a pattern with a very beautiful design and your blanket will definitely be very warm and soft.
Today, I’m excited to share a fresh crochet tutorial with you: mastering the Interlocking Shell Stitch.
A technique that has been gaining prominence in the crochet community is the intertwined shell stitch, an intriguing variation that adds texture and dimension to the work.
What is the Interlocking Shell Stitch?
The intertwined shell stitch is an elegant variation of the classic shell stitch in crochet. It involves the intertwining of multiple rows of shell stitches, resulting in a rich and intricate pattern. This technique is often used in projects where you want to add striking texture, such as blankets, scarves, bags, and even clothing.
Tips for Mastering the Interlocking Shell Stitch
- Practice consistency: The key to a successful intertwined shell stitch is to maintain a uniform and consistent tension throughout the project. This will ensure that your stitches look beautiful and uniform.
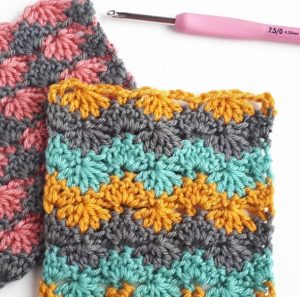
- Experiment with colors: One of the most fun things about the intertwined shell stitch is the ability to play with colors and patterns. Try different combinations to create stunning visual effects.
- Be patient: As with any new crochet technique, it may take some time to get used to the intertwined shell stitch. Don’t be afraid to make mistakes and be prepared to undo some stitches as you practice and refine your skills.
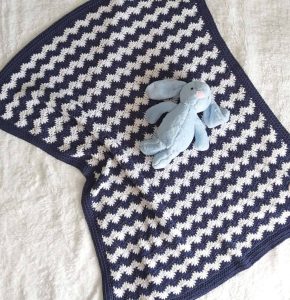
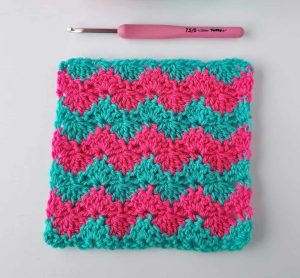
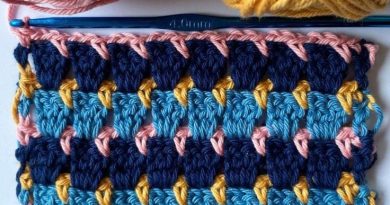
The Crochet Interlocking Shell Stitch produces a dense fabric rich in visual appeal and offers ample opportunities for creative color combinations.
It’s a wonderfully soothing stitch to engage with. Feel free to alternate colors with each row, or opt for a change every two rows like I did, for a mesmerizing wave-like effect.
How to Crochet the Interlocking Shell Stitch
MATERIALS NEEDED
I suggest two shades of worsted weight yarn and a 4.5mm crochet hook. Feel free to choose any yarn you prefer, along with a hook that matches its weight.
Abbreviations (USING US TERMS)
t-ch – turning chain
sc – single crochet
dc – double crochet
ch – chain
st – stitch
rep – repeat
SPECIAL STITCHES:
Double Crochet 5 Together (Dc5tog or Cluster):
Wrap the yarn over your crochet hook.
Insert the hook into the next stitch.
Wrap the yarn over again and pull up a loop (you’ll have 3 loops on the hook).
Wrap the yarn over and pull through the first 2 loops on the hook (2 loops left on the hook).
Repeat this process (wrap yarn over, insert hook, pull up loop, wrap yarn over, pull through 2 loops) four more times.
Once you have 6 loops on the hook, wrap the yarn over and draw it through all 6 loops to complete the stitch.
Changing Colors:
When you’re at the end of a row and want to switch colors for the next row, work the last yarn over of the row with the new color. This creates a neat transition between colors.
PATTERN INSTRUCTIONS
Foundation Row: Chain a multiple of 6 stitches + 1, then add 2 more stitches for the foundation row.
Row 1:
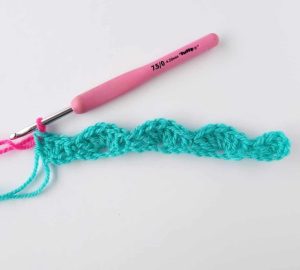
Make 2 double crochet stitches in the 3rd chain from the hook (this counts as 3 double crochet stitches).
Skip 2 chains, then make 1 single crochet in the next chain.
Repeat this pattern: *Skip 2 chains, make 5 double crochet stitches in the next chain, skip 2 chains, and make 1 single crochet in the next chain.
Continue repeating this pattern until you have 3 chains left.
Skip 2 chains, then make 3 double crochet stitches in the last chain.
Turn your work and fasten off the yarn.
Row 2:
Using Yarn B, chain 1 (this doesn’t count as a stitch).
Make 1 single crochet in the first stitch.
*Chain 2, make a cluster of 5 double crochet stitches together over the next 5 stitches,
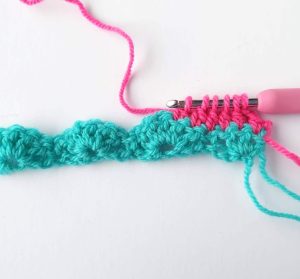
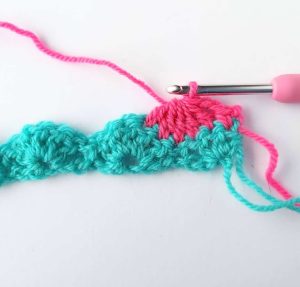
chain 2, and make 1 single crochet in the next stitch.
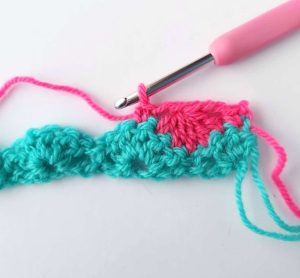
Repeat this pattern from * until you reach the end, making sure to end with a single crochet in the top of the turning chain from the previous row.
Turn your work.
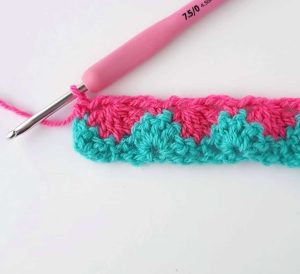
Row 3:
Chain 3 (this counts as 1 double crochet), then make 2 double crochet stitches in the first stitch.
Skip 2 chains, then *make 1 single crochet in the top of the next cluster of stitches.
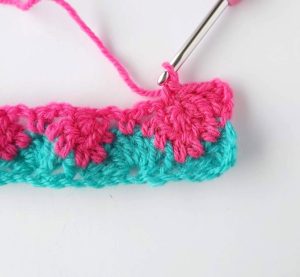
Skip 2 chains, make 5 double crochet stitches in the next single crochet stitch, skip 2 chains;
Repeat this pattern from* until you reach the last cluster of stitches.
Make 1 single crochet in the top of the last cluster of stitches, then skip 2 chains and make 3 double crochet stitches in the last single crochet stitch.
Turn your work and fasten off the yarn.
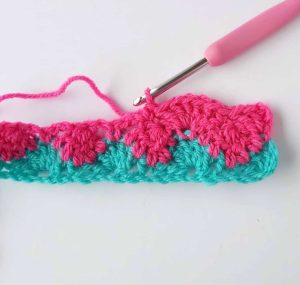
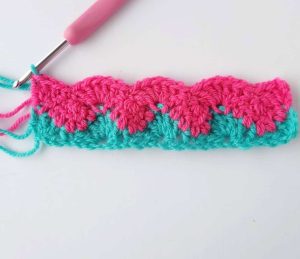
Repeat Rows 2 and 3: Keep repeating Rows 2 and 3, following the color sequence indicated above. Finish by ending on a Row 2. Finally, fasten off the yarn.
And… It’s done! Once you’ve mastered the technique of crocheting the Interlocking Shell Stitch, you’ll be able to create a variety of items, including blankets, washcloths, and numerous accessories!
VIDEO TUTORIAL
Dear reader, I want to make a video tutorial available to you. This tutorial can teach you how to do Interlocking Shell stitch. This tutorial is very educational and easy to follow, it’s from Hooked by Robin YouTube channel and you can watch it below:
CONCLUSION
This pattern is an exciting crochet technique that offers endless creative possibilities. With its lush texture and intricate patterns, it’s a stunning addition to any handmade project.
So, grab your crochet hook, choose your favorite colors and start exploring the wonderful world of interlocking shell stitch – your creative journey is just beginning!
Thank you very much for being here with us, dear reader. Follow our blog weekly, we have lots of patterns and news about the world of crochet for you. I hope you liked this pattern and that you do a beautiful job. Enjoy your day! XoXo

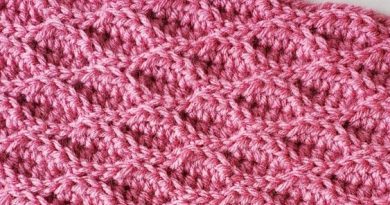

How many foundation chains do you need to make a baby blanket?