
How to Crochet Baby Booties
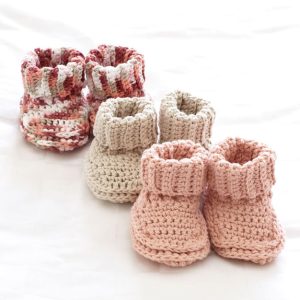
Hello my dear friends and crochet lovers! How are you feeling today? I hope everything is in order and under control. Today what brought you here is probably this beautiful pattern of little Crochet Baby Booties. Yes, the booties made for babies are very cute, a real charm with a lot of cuteness, don’t you think? And the good news is that this project is an extremely easy level, it’s much easier to do than you might think! In addition, they are very practical, pieces that bring comfort, elegance and softness in addition to keeping your baby’s little feet always warm.
Crochet Baby Booties are so beautiful and easy to make that you can make several in different colors and thus parade your baby around matching the little boots with the outfit and rocking the outfit. Get a variety of small examples of baby booties, you can certainly manage to make them in a single afternoon, or at most two. However, if you are a beginner and do not succeed in a short time, do not be discouraged! Practice makes perfect and for sure you’ll soon be doing them so fast you won’t even notice, just like watching tiktok videos.
A great option for gifting, the little Crochet Baby Booties are the perfect choice to give as gifts to people you know, future moms and dads, to use on birthdays, christenings, special dates and even on a daily basis. They are so amazing that it sure is a good request! If you perform a satisfactory job in the execution of this wonderful project, you will even be able to monetize it, earning an extra income with the little boots you produce, thus being able to sell them to moms, dads, aunties, godmothers, grandmas and grandpas who pamper their little newborn angels. Anyway, it is noted that this pattern is perfect and will be ideal for your day to day.
Some recommendations for you
Crochet Baby Booties. As it is an easy level project, there is not much secret when doing it. What you can do in the execution of your project is to let your creativity flow in the choice of colors for your line, make some application of other small crochet ornaments that you prefer, in short, leave the project as you want. Just be careful when using pearls or small items that can be swallowed by the baby, you should be careful with that, you never know, right?
We always recommend that in projects for babies you use hypoallergenic lines, they are already available in physical and virtual stores, if you can’t find them in your city you can order them online, but I believe that stores already have them too. Ask the attendant at your favorite craft items store for help, this way you will ensure more comfort and safety for your baby, but this is just a tip and you are not obliged to follow it.
The pattern is completely and you can access with the link below, so you can follow it without any problems, as it is very well written and easy to understand. We recommend that in addition to reading, you watch the video tutorial for a better understanding and this will help you in the execution of the project. If you have any yarn left over from an old project, grab your crochet hooks and practice together, that way you’ll be able to improve your skill.
Here are the instructions with a clearer format
MATERIAL REQUIRED
Yarn in your choose color(s)
A size G-6 crochet hook (4.00mm)
Scissors
Notes:
Be careful when choosing your yarn. Choosing a soft and lightweight yarn is best for baby booties is the best option, you can use #1 superfine yarn or #2 fine yarn. You can easily find these yarn ratings and characteristics present on the yarn packaging. Choose the type of yarn you will use and the color that best matches the project you are envisioning, this way the boots will be nice and soft.
Choose your hook size. We suggest you use one in size G-6 (4mm) to design your booties. The size is usually located on the hook handle, but if you are in doubt, you can use a hook sizer to check its size.
Gauge indicates the number of stitches that will be needed for a given type of yarn to reach a specific measurement. The gauge also depends on the size of needle you will be using. Gauge is important to ensure the piece you create is the right size.
The combination of yarn and needle should produce a double half chain consisting of 15 stitches, measuring approximately 10 centimeters in length. If the gauge is not as expected, you can make adjustments by using lighter or heavier yarn or modifying the needle size accordingly.
STITCH ABBREVIATIONS:
SC – Single Chain
HDC – Half Double Crochet
DC – Double Crochet
TC – Treble Crochet
SL – Slip Stitch
Ch – Chain
PATTERN DIRECTIONS
Round 1: Create an initial chain of 11 stitches, which will serve as the foundation for your first bootie. Once your chain is complete, turn it back and initiate the single crochet stitch on the chain. Keep crocheting around the bootie foundation using the single crochet stitch for a complete round.
Upon completing the first round, you should have a total of 24 stitches.
Round 2: Begin by crafting two chain stitches, followed by connecting them with two half double stitches (HDC). Subsequently, crochet eight half double stitches, followed by five stitches in which each one contains two half double stitches. Next, return to single half double stitches for the subsequent eight stitches, and then execute another five stitches, each consisting of two half double stitches. Complete this round by joining it with a slip stitch into the top of the initial round. At the conclusion of this round, you should possess a total of 32 stitches.
Round 3: Crochet two chain stitches and then connect them with two half double stitches. Next, work 12 half double stitches, followed by two stitches, each consisting of two half double stitches. Continue by crocheting single half double stitches for the next 12 stitches and conclude with another two stitches, each comprising two half double stitches. To complete this round, join with a slip stitch in the top of the initial round. At the conclusion of this round, you should have a total of 36 stitches.
Round 4: Create two chain stitches, followed by crocheting into the back loops using the half double stitch until you reach the end of the round. Remember to exclusively work with the back loops. Conclude the round by joining it with a slip stitch. By the end of this round, you should have a total of 36 stitches.
Round 5: Make two chain stitches, and then proceed to work both loops. Employ the half double stitch to crochet around until you reach the end. Make sure to work the stitches through both loops for this round. Finally, join the round with a slip stitch, resulting in a total of 36 stitches by the conclusion of this round.
Round 6: Create two chain stitches, followed by crocheting ten half double stitches. Next, decrease by half double stitching two together a total of six times. Finally, complete the round by continuing with half double stitches until the end. To finish, join the round with a slip stitch, resulting in a total of 30 stitches.
Round 7: Make two chain stitches, followed by nine half double stitches. Afterward, perform four consecutive decreases by half double stitching two stitches together each time. Finally, continue with half double stitches until you reach the end of the round, and secure the round by joining with a slip stitch. Your total stitch count should be 26 at the conclusion of this round.
Round 8: Create a single chain, followed by nine single crochet stitches. Subsequently, perform two consecutive half-double crochet stitches together twice. Continue with single crochets until you reach the end of the round, and conclude by joining with a slip stitch. This will result in a total of 24 stitches at the end of this round.
Round 9: Form a single chain stitch, followed by single crocheting in the subsequent five stitches. Then, create a sequence of four chain stitches and skip the following eight stitches. Proceed to single crochet until you reach the end of the round, and complete the round by joining with a slip stitch. To complete the bootie, weave in the loose ends; a yarn needle may be required for this task. Repeat these instructions to craft the second bootie.
Crocheting baby booties is a fun and very rewarding project. This is an easy and very simple pattern that you can follow to make a cute and cozy pair of booties for a beautiful baby, perfect pattern for beginners and yet with a lot of personality.
Access the free crochet pattern/ How to Crochet Baby Booties
Dear reader, here we would like to make available to you an adorable video tutorial from the YouTube channel LovinglyNie so that you will be able to better follow the step by step and understand all the techniques to make your beautiful baby booties. We encourage you to watch it before trying to execute this project, this way you will become better familiar with the pattern and you will be able to make your little baby boots in the most perfect way.
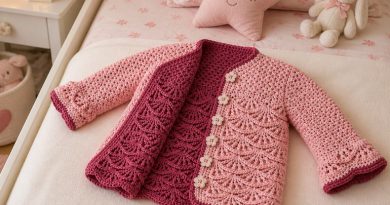
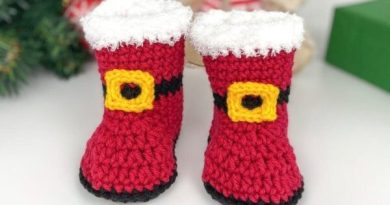
By the way, we leave here below some beautiful pattern suggestion options that can also inspire you in future projects. We think you’ll also like:
We hope you enjoyed this amazing pattern of crochet baby booties, let us know what you think, we love to hear what you think about the patterns we have made available for you here. If you have any questions or suggestions for a pattern for our lovely blog, let us know too, your comments are most welcome.
Thank you so much for being here with us in our space of love where we share craft learning. Follow our other articles, we have amazing patterns for you! Take a look!!!
I hope the pattern we provide will help you make some adorable baby booties!
Grab your crochet hooks right now and let’s crochet, see you next time.
Happy crochet!
Me gusta aprender hacer sapatico