How to crochet the Chain Stitch
Crochet is a beautiful art that allows you to do wonders. And most of the amazing projects out there start with a simple chain stitch. A fundamental skill in crochet is the chain stitch. This is the foundation for many crochet patterns. Here we will explore how to crochet chain stitch, step by step. Don’t worry if you’re a beginner, I’ll show you exactly where to start.
By the way… What is a chain stitch?
The chain stitch in crochet is the simplest and most basic stitch, the first step of a journey, this stitch is what will form the basis of your work. It’s like a canvas on which you will paint your crochet masterpiece. Chain stitches are often used to create the baseline of a project, to establish the desired width, or as a connecting element between more complex stitches.
Let’s look at the necessary materials:
Before you start crocheting in chain stitch, you will need to separate some materials:
- Yarn: Choose your preferred color and weight. Beginners often find it easier to work with medium weight yarn, but you can experiment with different types as you gain experience.
- Crochet hook: The size of the hook should match the weight of the yarn you are using. The recommended size is usually listed on the yarn label.
- Scissors: To cut the thread at the end of the work.
Step by step guide to chain stitch crochet:
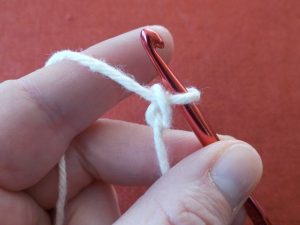
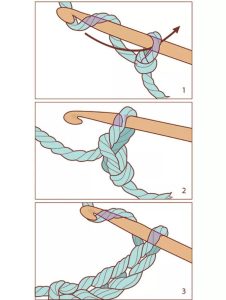
Make a slip knot: Start by creating a slip knot. This loop will act as your first chain stitch. Leave an end of yarn about 4 to 6 inches long as it will be used for weaving at the end.
Insert the hook: Insert the crochet hook into the slip knot and tighten it by pulling the working thread (the thread attached to the skein) through the loop.
Yarn over: With the needle now passing through the slip knot, thread the yarn through. To do this, simply wrap the working thread around the needle, moving it from back to front.
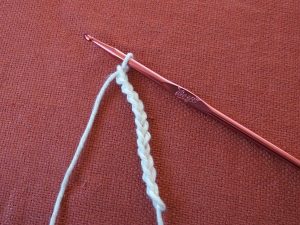
Pull: Pull the yarn through the loop you made when you inserted the needle. You will now have two loops on your hook.
Repeat steps 3 and 4: Continue to yarn over and pull through the loop through as many chain stitches as the pattern requires. This process will create a chain of interconnected loops.
Count your stitches: To ensure you have the right number of chain stitches, count the Vs at the top of the chain. Each V represents a current point.
Fasten: When you reach the desired number of chain stitches, cut the yarn, leaving a 4-6 inch tail, and pull the cut end through the loop on the needle. This protects your work.
Tips for success:
Practice: The key to mastering the chain stitch, like any crochet technique, is practice. Start with a small project to get the hang of it.

Maintain tension: Keep tension consistent for perfect, even chain stitches. Too loose or too tight can affect the result.
Use the right hook: Make sure your crochet hook matches the recommended yarn size for the best results.
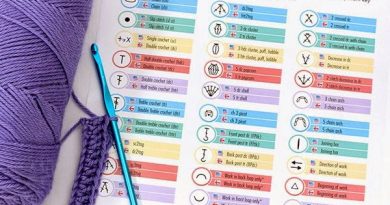
Read the patterns: Chain stitches are typically indicated by the abbreviation “ch” in crochet patterns. Follow the pattern instructions carefully.
VIDEO TUTORIAL
Here we have put together a lovely explanatory video so that you, as a beginner, can better understand how to perform the movements when making your beautiful Chain Stitch. The video tutorial is from the Craftsy channel and you can watch it below:
Conclusion
The chain stitch is the foundation on which you will build your crochet creations. Learning this essential technique is a significant step towards becoming a proficient crocheter. As you gain more experience, you will find that chain stitches will become second nature and you will be able to focus on more complex and exciting crochet projects. So, grab your yarn, your crochet hook and start threading to create beautiful creations!