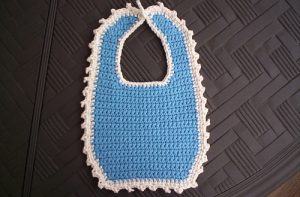
Bibs and Booties
Hello dear crochet lover. Today I want to share with you a pattern that is really cute! A good choice for first-, second-, third-time mothers… Anyway, moms and dads on any trip. I’m talking about the amazing baby bibs and booties. This pattern makes a truly wonderful gift to rock any baby shower. Which mother wouldn’t want to win a complete kit like this to be used every day?
With a combo of bibs and boots for every day of the week, this wonderful kit presented here in this pattern brought today is simply complete and exceptional! They are essential items in the baby layette and more than necessary for the day to day of drooling moms and dads, second only to diapers and bottles. Don’t really like the design? Don’t worry, it can be modified according to your needs.
You can feel completely free to make this beautiful pattern in exactly the colors you want, according to your taste and preferences. You can also embroider them with your baby’s names if you want, that’s up to you. Either way, this baby set will remain adorable.
Bibs and Booties . The pattern is completely free and is available here for you to follow, it is very easy to follow step by step so that you can understand it very easily without needing to have an advanced level of crochet experience to be able to execute this beautiful project. .
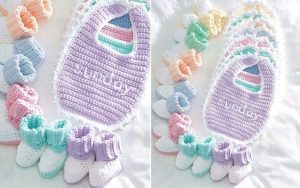
Baby projects are always very popular in the world of crafts, because not only do they never go out of style, they are as delicate as the babies themselves. They match the cute, sweet and delicate universe of these little gems that are little children, don’t they? And this specific pattern does not leave anything to be desired, exuding a lot of beauty and with a touch of cuteness.
Follow the free pattern calmly, read carefully so that you can execute the project without major difficulties. This step-by-step was very well written and following it won’t be a problem, in addition, we recommend that you take your favorite lines for the project or even some other lines from an old project to practice before making the official project. Do and redo as many times as necessary, making mistakes and starting over is not the problem and also, practicing will allow you to be more skillful with the pattern and improve your techniques and crochet skills.
For baby projects we always recommend using hypoallergenic threads, this to ensure the baby’s greater safety if they put it in the mouth or something similar, in addition, it is not advisable to use any small object for application that can be swallowed by your little one.
This Bibs and Booties kit is wonderful and a great gift option for baby showers, birthdays, christenings or whatever the occasion. It is also a great way for you to earn extra income if you want to sell some of these kits to those who have babies and no experience with crochet, as it is a delicate and handmade work you will be able to charge a good amount so that you can earn a extra money.
Here are the instructions with a clearer format
MATERIAL:
Supplies required for this project:
Yarn
BIB AND BOOTIES
-
- Main Color (MC): 2 balls
- Contrast A: 1 ball
Size 4 mm (U.S. G or 6) crochet hook or the appropriate size needed to achieve the desired gauge.
Buttons (for fastening)
GAUGE:
14 single crochets (sc) and 16 rows = 4 inches [10 cm].
STITCH ABBREVIATIONS:
SC – Single Chain
HDC – Half Double Crochet
DC – Double Crochet
TC – Treble Crochet
SL – Slip Stitch
Ch – Chain
PATTERN DIRECTIONS
BIB BODY:
Using MC yarn, create a foundation chain.
Row 1: (Right Side – RS). Start with a single crochet (sc) in the second chain from your hook. Continue with 1 sc in each chain until you reach the end of the chain. Turn your work. You should have 19 stitches.
Row 2: Chain 1. Make 2 sc in the first stitch. Then, work 1 sc in each stitch until you reach the last stitch. Make 2 sc in the last stitch. Chain 1 and turn.
Row 3: Work 1 sc in each stitch until you reach the end of the row. Turn. Rows 4 to 9: Repeat the last two rows (Row 2 and Row 3) three more times. This will bring your stitch count to 27. Continue working even until your work measures 6½ inches [16.5 cm] from the beginning, ending with the Right Side (RS) facing for the next row.
Neck Shaping:
Row 1: (RS). Chain 1. Make 1 sc in each of the first 6 stitches. Yarn over (yoh) and draw up a loop in each of the next 2 stitches. Yarn over and draw through all 3 loops on the hook – this creates an sc2tog (single crochet two together). Turn. Leave the remaining stitches unworked.
Row 2: Chain 1. Make an sc2tog over the first 2 stitches. Then, work 1 sc in each stitch until you reach the end of the row. Turn.
Row 3: Chain 1. Work 1 sc in each stitch until the last 2 stitches. Make an sc2tog over the last 2 stitches. Turn. You should have 5 stitches now. Work 10 more rows even.
Next row: (Wrong Side – WS). Chain 1. Make 2 sc in the first stitch. Follow the pattern to the last 2 stitches. Make an sc2tog. Turn.
Next row: Chain 1. Make an sc2tog. Work 1 sc in each stitch until the last stitch. Make 2 sc in the last stitch. Turn. Repeat the last 2 rows two more times. Fasten off.
With the RS of your work facing, skip the next 11 stitches. Join MC with a slip stitch to the next stitch. Chain 1. Make an sc2tog over this stitch and the next stitch. Work 1 sc in each stitch until the end of the row. Turn. Work to correspond to the first side, reversing all shapings.
Edging:
Join A with a slip stitch to the top left corner of the neck edge. Chain 1. Make 1 sc in the same space as the last slip stitch. Work 1 row of single crochet (sc) stitches evenly around all edges. Join with a slip stitch to the first sc.
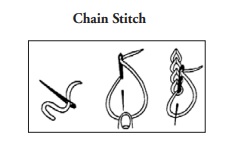
Next round: Working around the outer edge only, chain 1. *Make 1 sc in each of the next 3 stitches. Chain 3. Slip stitch in the first chain to create a picot. Repeat from * to the opposite side. Fasten off. Using A, split the yarn into 2 plies and embroider the letters using the chain stitch. If desired, sew a button in position and create a button loop at the center back on the left side.
Cuff:
Begin with your main color (MC). Chain 16.
First row (right side): Single crochet (sc) in the second chain from the hook. Continue to sc in each chain until the end of the chain. Turn. You should have 15 stitches.
Second row: Working into the back loop only of each stitch, chain 1, then sc in each stitch to the end of the row. Turn.
Repeat the second row until your work measures 6¼ inches (16 cm) when slightly stretched. Do not fasten off.
Body:
First row (right side): Chain 1. Work 23 sc evenly across the long edge of the cuff. Join color A. Turn.
Second row: With color A, chain 1, then work 1 sc in each sc to the end of the row. Fasten off.
Instep:
First row: With the right side of your work facing you, skip the first 7 stitches. Join color A with a slip stitch to the next stitch. Chain 1, then work 1 sc in the same space. Continue to work 1 sc in each of the next 8 stitches. Turn. You should have 9 stitches.
Second to fourth rows: Chain 1, and work 1 sc in each stitch to the end of the row. Turn.
Fifth row: Chain 1, sc2tog, then work 1 sc in each of the next 5 stitches. Sc2tog. Turn.
Sixth row: Chain 1, sc2tog, then work 1 sc in each of the next 3 stitches. Sc2tog. Fasten off.
Assembly:
Sew the center back seam. With the right side of your work facing you, join color A with a slip stitch at the center back. Chain 1, then work 1 sc in each of the next 7 stitches. Work 5 sc down the side of the instep. In the corner sc, work 3 sc. Continue with 3 sc across the end of the instep. Work 3 sc in the corner sc. Finally, work 5 sc along the other side of the instep and finish with 1 sc in each of the next 7 stitches. Join with a slip stitch to the first stitch, resulting in a total of 33 stitches.
Next round: Chain 1 and work 1 sc in each stitch around. Join with a slip stitch to the first stitch.
Next round: Chain 1 and work 1 sc in each stitch around. Join with MC (main color) with a slip stitch to the first stitch.
Next round: With MC, chain 1. Working in the back loops only, work 1 sc in each stitch around. Join with a slip stitch to the first stitch.
Next round: Chain 1, sc2tog, then work 1 sc in each of the next 12 stitches. Sc2tog, then work 1 sc in the next stitch. Sc2tog, and finally, work 1 sc in each of the next 12 stitches. Sc2tog. Join with a slip stitch to the first stitch.
Next round: Chain 1, sc2tog, then work 1 sc in each of the next 10 stitches. Sc2tog, then work 1 sc in the next stitch. Sc2tog, and finally, work 1 sc in each of the next 10 stitches. Sc2tog. Join with a slip stitch to the first stitch.
Next round: Chain 1, sc2tog, then work 1 sc in each of the next 8 stitches. Sc2tog, then work 1 sc in the next stitch. Sc2tog, and finally, work 1 sc in each of the next 8 stitches. Sc2tog. Join with a slip stitch to the first stitch. Fasten off. Join the center foot seam.
Notes:
• enlarge these words 250%
• trace onto bib with carbon paper for embroidery
What do you think of this beautiful pattern? It’s amazing isn’t it? That’s why you should send it right now to your best contacts, so that your friends can also make this beautiful project for their children, nephews or grandchildren. If you have any questions, suggestions or something to tell us, leave it in the comments, we are always ready to answer everything you have to say. It’s a beautiful pattern, it’s totally free, and here we have the PDF with the directions made by Yarnspirations and you can access it through the link we left here for you.
Access the free pattern/ Bibs and Booties
VIDEO TUTORIAL
Dear reader, we would like to emphasize the importance of you watching the video tutorial, it will definitely help you a lot when following the written pattern step by step. We will leave videos of the two different patterns here that you can watch as many times as you want and repeat the movements along with the video to familiarize yourself better before doing the project. The video of the crochet bibs is from the Yarnspirations YouTube channel and you can watch it below:
We will also leave here a beautiful crochet bootie pattern for you to follow.
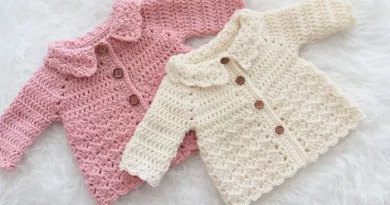
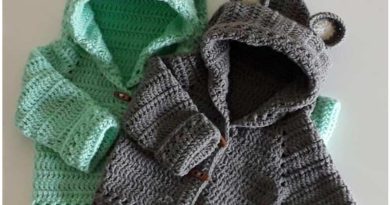
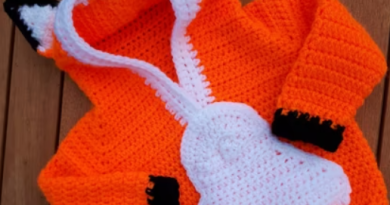
In case you are still in doubt about your next crochet job and the pattern you are going to choose to use in it, here are some more pattern options that you can take a look at and that can serve as inspiration for you, our blog is full of them, they are a variety of free and very beautiful patterns. Access some more of our crochet models that we separate exclusively for you! Some projects that suit you:
It is always a pleasure to have you here in our lovely space for love and learning crafts, I hope you come back often and follow other articles on our blog, we have a lot of material available here with different patterns of crafts for different age groups. Now let’s get down to business, you already have the pattern in hand and ready to start another enchanting adventure, grab your crochet hooks, snuggle in your favorite spot with your threads and get to work! See you soon. Have a great day!
Love, Handmade Learning Here Team