
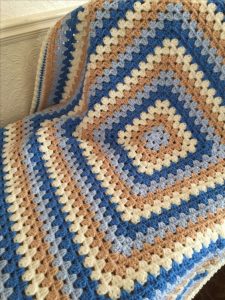
Basic Granny Blanket
Welcome, my reader friend. Today we will have another incredible pattern for you, let’s say it is a classic from the crochet world and you can do it with a few simple steps that we leave here. The granny square blanket is simply charming… Is it basic? Indeed, it is. Nevertheless, its inherent beauty and simplicity bestow upon it a charming radiance and a touch of old-world elegance.
I believe that those who like to crochet probably come across Grandma Square at some point. It is an incredibly versatile and widely created piece in the world of crochet, making it difficult to ignite – especially for beginners, given its adequacy as a great starting pattern. These blankets can be created in various sizes, ranging from a small 10 x 10 inch square to a charming piece to a substantial square of 108 x 108 inches for a King or even larger King blanket!
Over the years, I personally created numerous square blankets of Grandma, ranging from a huge square to an assembly of many mini squares. Although there are numerous on -line tutorials demonstrating how to create squares and grandma blankets, this basic tutorial will show my approach to creating a blanket with a single considerable square, complete with an elegant wavy border.
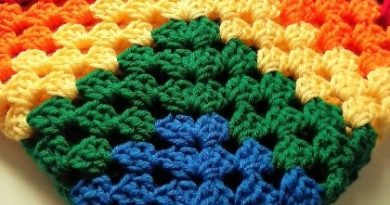
When it comes to color patterns, the options are practically unlimited for these blankets. You can opt for a single color, create two-color stripes, try multiple thick stripes with a variety of colors-multeatizes, the choice is yours! For the purposes of this tutorial, I changed by color with each round, but I will provide instructions for those who prefer to get the same color for each round. So, without further ado, here is Grandma’s fundamental blanket!
Simple Granny Square Blanket Materials:
- Crochet Hook – 4mm [G]
- DK/Light Worsted Weight Yarn in 3 colors (C01, C02, C03)
- Yarn/Embroidery Needle
Abbreviations:
- Ch – Chain Stitch
- Dc – Double Crochet
- SlSt – Slip Stitch
- St/Sts – Stitch/Stitches
- Sp/Sps – Space/Spaces
Gauge: No specific gauge, focus on keeping your stitches tight to avoid large gaps in your work.
Finished Size: Customize your blanket to your desired dimensions.
Notes:
- This pattern uses US crochet terms.
- Work the pattern in the round unless otherwise indicated.
- The number at the end of each round indicates the total stitches.
Basic Granny Blanket – STEP BY STEP
Basic Granny Blanket Body
Ch 4, Join with a SlSt to the beginning Ch.
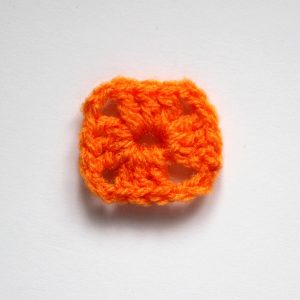
Round 1
Round 1
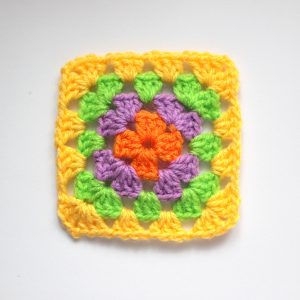
Chain 3 (considered as the 1st double crochet throughout the pattern), double crochet 2, chain 2, double crochet 3, chain 2 repeated 3 times (all within the starting ring). Join with a slip stitch to the beginning chain 3. This completes 12 double crochets and creates 4 chain-2 spaces.
To start the next round, you can either:
Finish off and cut the yarn from the first round. Attach a new colored yarn with a slip stitch to any of the chain-2 corner spaces
or.
Slip stitch into each double crochet until reaching the next chain-2 corner space, and finally into the corner space itself. This positions your working yarn at the center of the corner to begin the next round.
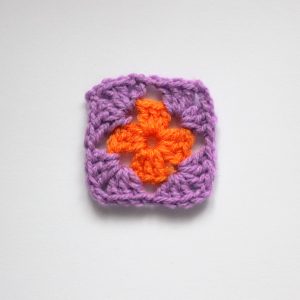
Round 2
Round 2
Chain 3, make 2 double crochets, chain 2, then make 3 double crochets all into the starting corner space.
Chain 1.
Repeat the following sequence three times: make 3 double crochets, chain 2, then make 3 double crochets into the next corner space. After each sequence, chain 1.
Join the round by making a Slip Stitch into the initial chain-3. This completes the round and you should now have 24 double crochets, 4 chain-2 spaces, and 4 chain-1 spaces.
To the next round, you can choose either of these two methods:
- If you want to change colors, finish off and cut the yarn from the first round. Attach a new color yarn by making a Slip Stitch into any of the chain-2 corner spaces.
or
- If you’re sticking with the same color, make a Slip Stitch into each double crochet until you reach the next chain-2 corner space. Finally, make a Slip Stitch into the corner space itself. This will position your working yarn at the center of the corner for the beginning of the next round.
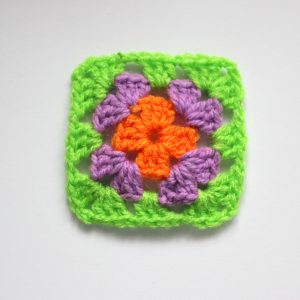
Round 3
Round 3
Start by doing 3 double crochets (Dc) and 2 chain stitches (Ch) into the corner space. Chain 1, then do 3 double crochets into the next chain-1 space. Chain 1 again. Repeat 3 double crochets, 2 chain stitches, 3 double crochets into the corner space, chain 1, and do 3 double crochets into the next chain-1 space, chain 1. Do this pattern three times in total. Finally, join with a slip stitch (SlSt) to the beginning chain-3. This round will result in 36 double crochets, 4 chain-2 spaces, and 8 chain-1 spaces.
To start the next round, you can either:
- Cut and finish the yarn from the first round, then attach a new color yarn by slip stitching to any of the chain-2 corner spaces.
or
- Slip stitch into each double crochet until you reach the next chain-2 corner space, and then slip stitch into the corner space itself. This will position your yarn at the center of the corner for the beginning of the next round.”
Round 4
Round 4
Begin with Ch 3, then Dc 2, Ch 2, Dc 3 into the starting corner space. After that, Ch 1.
Continue with Dc 3 into the next Ch 1 space, Ch 1, and repeat this pattern around the corner spaces: Dc 3, Ch 2, Dc 3. Ch 1.
After completing three sets of Dc 3, Ch 2, Dc 3 in the corner space, continue with Ch 1, Dc 3 into the next Ch 1 space, Ch 1, and repeat this pattern for the remaining sides.
Finally, join with a Slip Stitch (SlSt) to the beginning Ch 3. This round should result in 48 Double Crochets (Dc), 4 Ch 2 spaces in the corners, and 12 Ch 1 spaces along the sides.
To start the next round, you can either:
- Bind off and cut the yarn from the first round. Attach a new color yarn with a Slip Stitch (SlSt) to any of the Ch 2 corner spaces.
OR
- Slip Stitch (SlSt) into each Double Crochet (Dc) over to the next Ch 2 corner space and, finally, into the corner space itself. This will bring your working yarn into the center of the corner for the start of the next round.
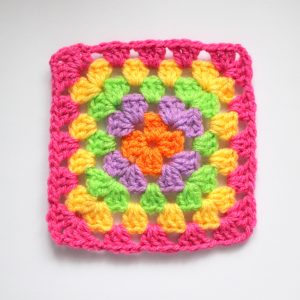 Round 5
Round 5
Slip stitch (SlSt) over to the next corner space (Sp).
Chain 3, then double crochet (Dc) twice, chain 2, and double crochet 3 times into the starting corner space. Chain 1.
Double crochet 3 times into the next chain-1 space, chain 1, and repeat this pattern for the next two chain-1 spaces.
*In the corner space, double crochet 3 times, chain 2, and double crochet 3 times. Chain 1, and double crochet 3 times into the next chain-1 space, chain 1, and repeat this pattern for the next two chain-1 spaces**. Repeat this entire sequence ( from * to **) three times.
Join with a slip stitch (SlSt) to the beginning chain-3. This round should result in 60 double crochets, 4 chain-2 spaces, and 16 chain-1 spaces.
To start the next round, you can either:
- Bind off and cut the yarn from the first round. Attach a new color yarn with a slip stitch to any of the chain-2 corner spaces.
or
- Slip stitch into each double crochet over to the next chain-2 corner space, and finally into the corner space itself. This will bring your working yarn into the center of the corner for the start of the next round.
Keep repeating these steps until your blanket reaches the desired size. For example, when using DK yarn and a 4mm hook, I typically create a baby blanket measuring 40” x 40” in 47 rounds, plus an additional round for the border.
Basic Granny Blanket Boarder:
Finishing your blanket offers various options, ranging from straightforward stitches to more intricate designs. One simple border pattern I often use for baby blankets is a wavy pattern with double crochet (Dc).
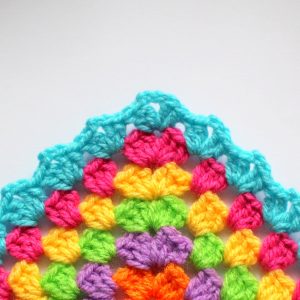
(Ensure you start in one of the four corner spaces before continuing.)
Chain 3, Double Crochet (Dc), Chain 3, Dc 2, all into the starting corner space.
Double Crochet 2, Chain 2, Double Crochet 2 all in the next Chain 1 space. Repeat this pattern across the entire length of the blanket until you reach the next corner space.
Double Crochet 2, Chain 3, Double Crochet 2 into the corner space.
Double Crochet 2, Chain 2, Double Crochet 2 into the next Chain 1 space. Repeat this pattern around the entire blanket.
Join with a Slip Stitch (SlSt) to the beginning Chain 3.
Finish Off, Secure Loose Ends.
Congratulations! Your beautiful blanket is complete!
Conclusion
While this guide serves as a basic introduction to creating a Basic Granny Blanket for beginners, I hope it has been helpful to some. If you have any questions, tips, pattern corrections or specific requests, don’t hesitate to comment below in the comments. I will be more than happy to help you. We love to hear your questions or suggestions! Thank you again for being here on our lovely blog. Know that we are bringing new patterns every week, look at our other articles, I guarantee we have incredible patterns that can be added to your wish list. I hope you have a beautiful day and that your crochet is filled with joy! See you soon. XoXo


I recently retired from nursing after 51 years. I am looking to start crocheting again as it’s good for my arthritis and my mind lol . You inspire me!
I love this pattern I think it will be easy to follow thank you+ I intended to use baby white wool through out .
I am retired and enjoy crocheting while I watch tv. I usually stick with basics but I like to try new things, if they arent too involved! This would be a good item to use up the small amounts of left over yarn.
My hubby found your blanket and wants me to make it however, he wants it rectangle instead of square, how would I go about making it that way as I’m still a crochet novice. TIA